This tutorial explains how to add a new round of questionnaires to a cohort's questionnaire page. The example below uses R22 (2025) of the NLSY97, but the same process can be used for any cohort and round.
Overview
The Questionnaires page displayed under Other Documentation is not a single editable page. Instead, it is a view that combines individual questionnaire pages for each round into one listing. To add a new questionnaire round, you will:
- Clone the most recent questionnaire page
- Update the page title and summary
- Upload the new questionnaire files
- Replace links with the new file URLs
- Add or remove questionnaire entries as needed
- Give each questionnaire a unique ID
- Update the page's URL alias
- Verify all links and publish the page
Step 1: Locate the most recent questionnaire page
Navigate to: NLSY97 → Other Documentation → Questionnaires
Scroll to the bottom of the list to identify the most recent questionnaire round available. In this example, the latest questionnaire page is R21 (2023).
Find the individual page to clone:
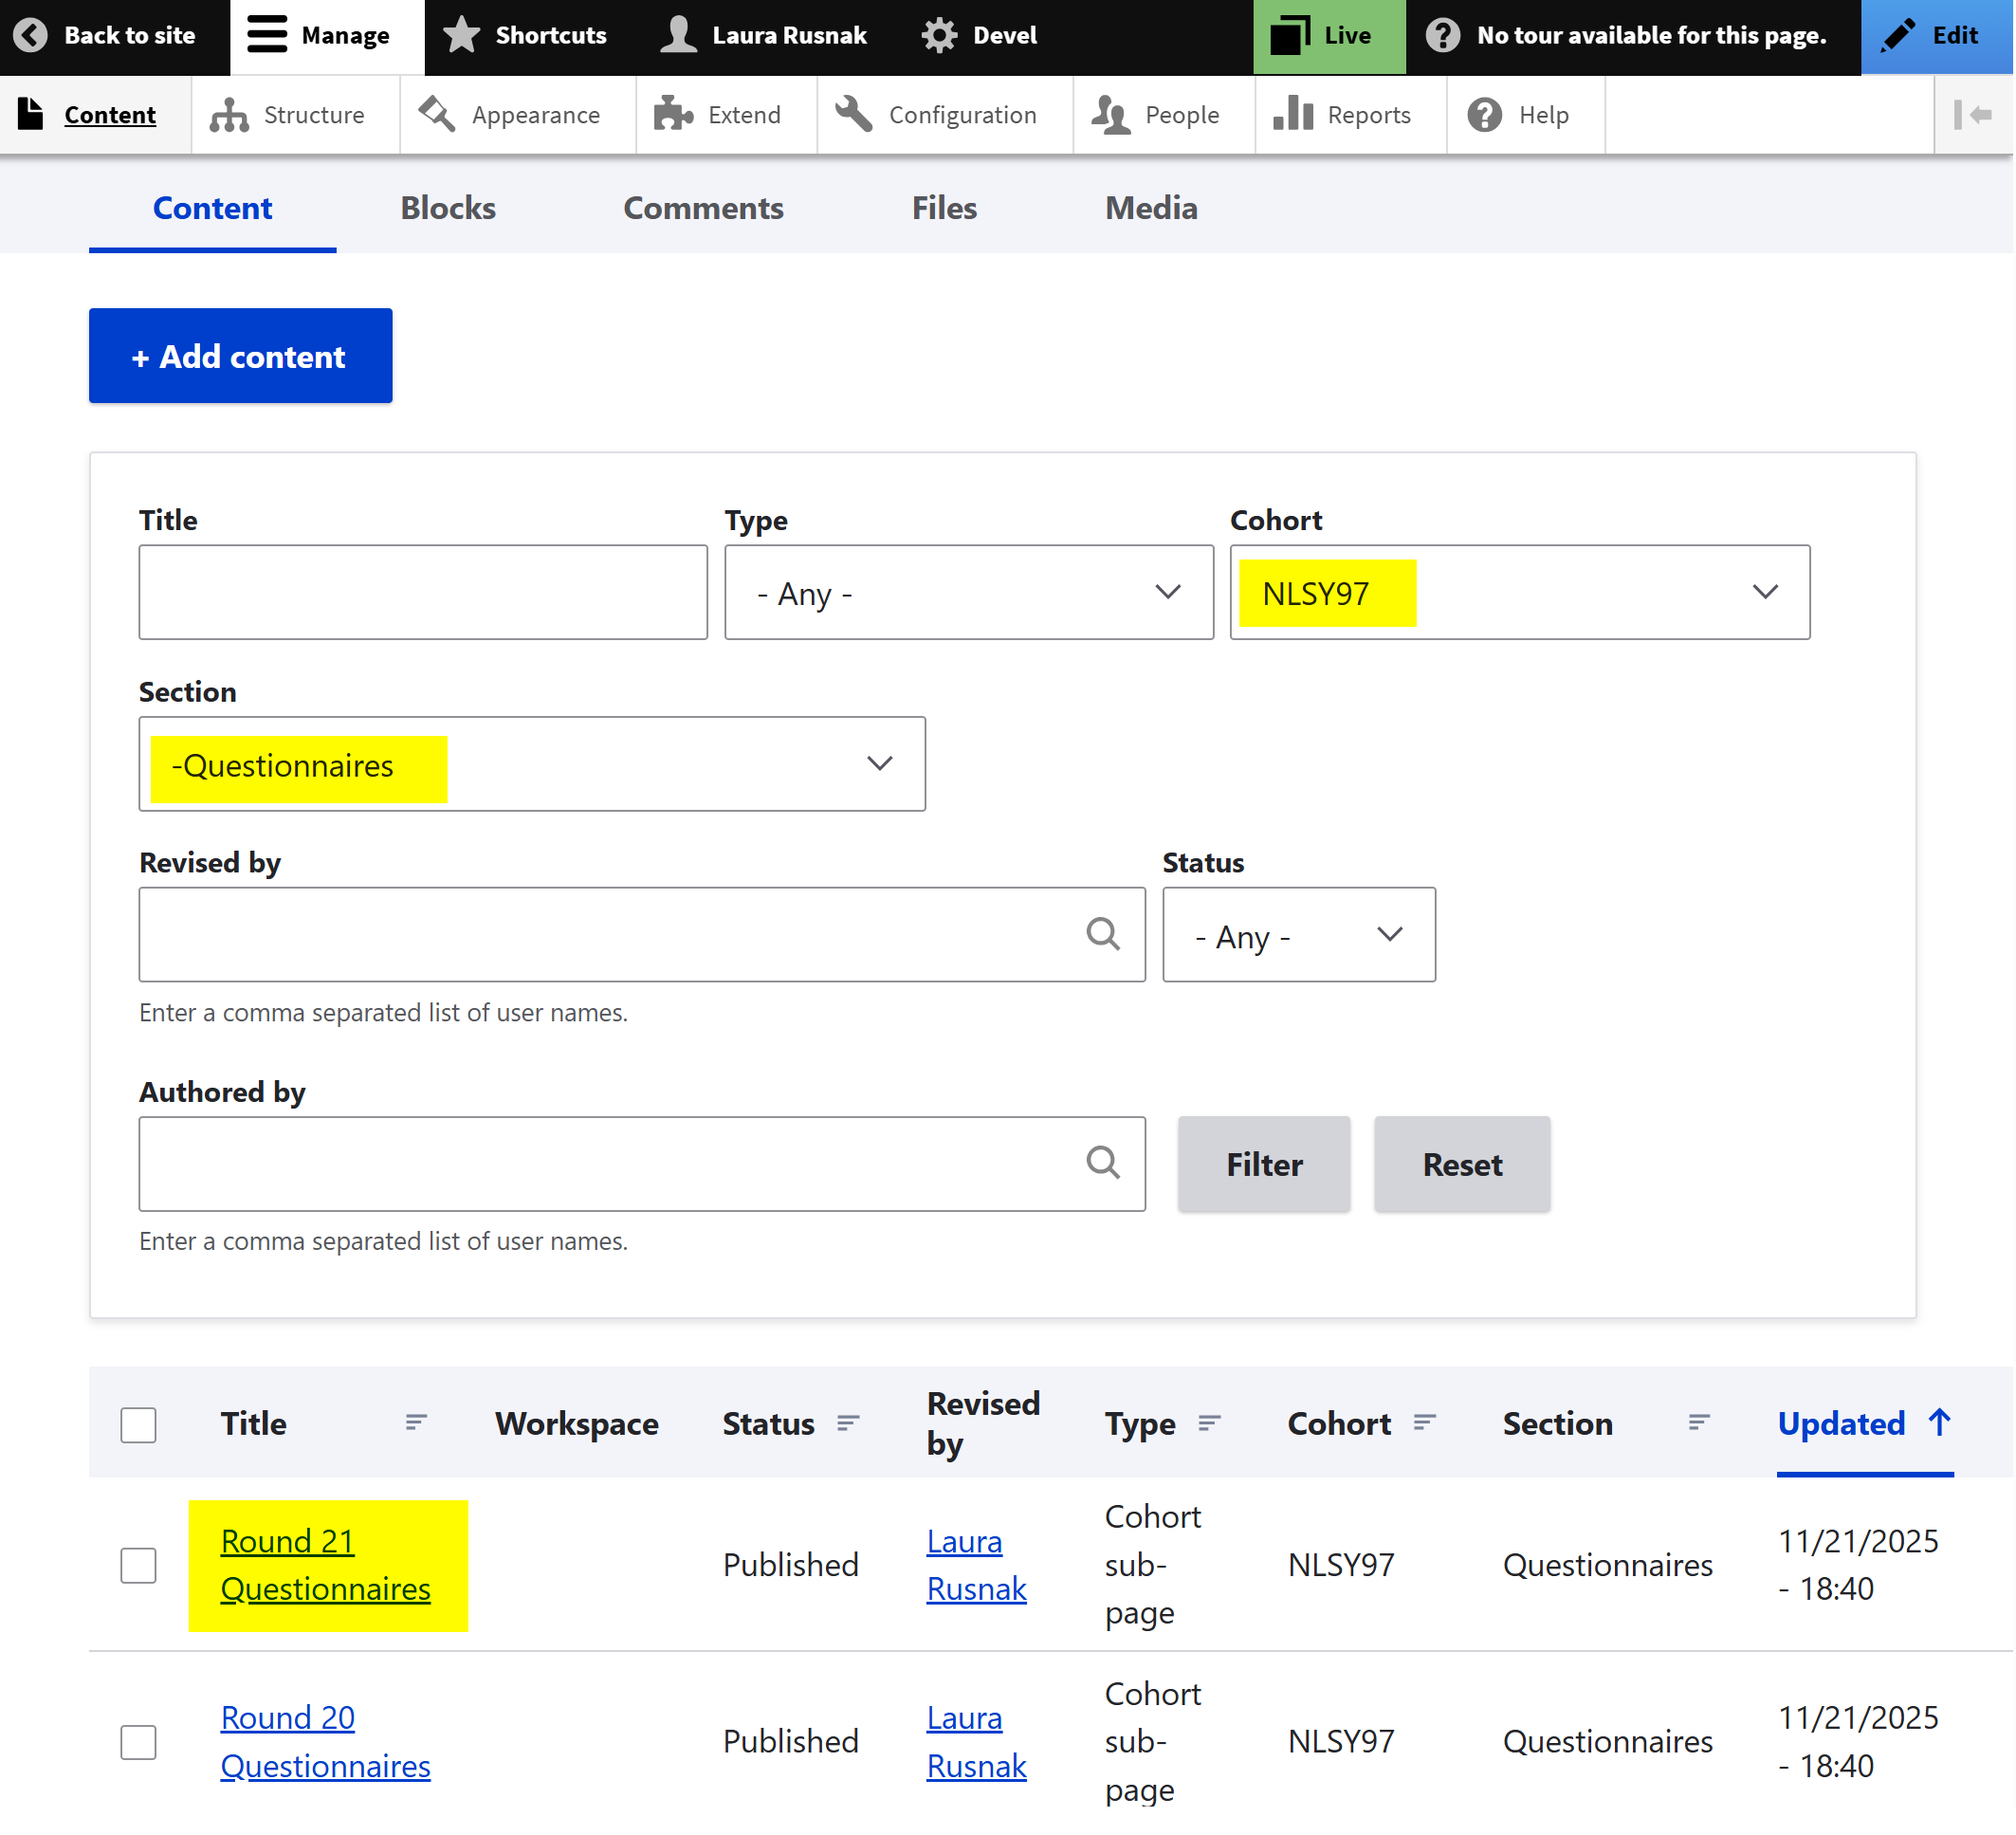
- Go to Manage → Content
- Search for the most recent questionnaire page. You can search by:
Cohort = NLSY97andSection = Questionnaires, orTitle = R## Questionnaires(replacing ## for the round number, Ex: R21)
- Open the existing questionnaire page by clicking its Title
Step 2: Clone the page
- Click Clone
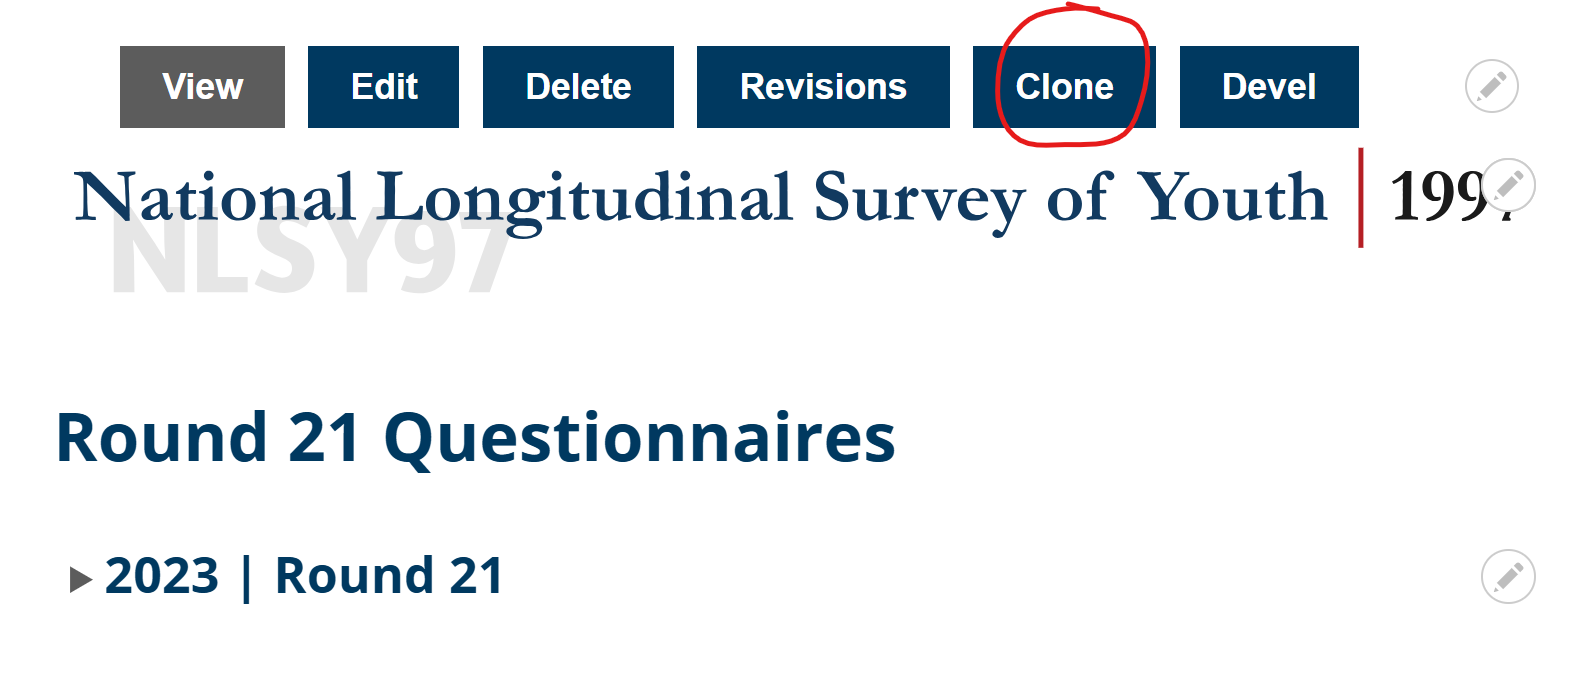
- Update the following information:
- Title: Remove "Clone of" and change the round
- Example: "Clone of Round 21 Questionnaires" → "Round 22 Questionnaires"
- Summary text: Update the year and round
- Example: "2023 | Round 21" → "2025 | Round 22"
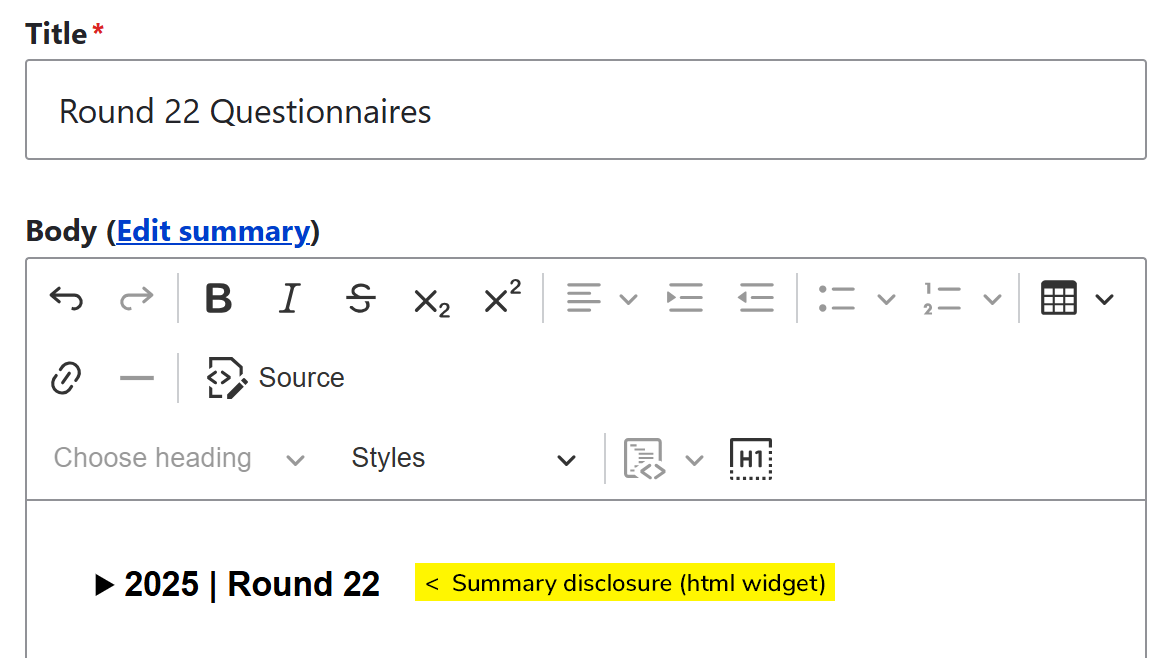
- Example: "2023 | Round 21" → "2025 | Round 22"
- Title: Remove "Clone of" and change the round
Step 3: Upload questionnaire files
The next step is to upload the HTML questionnaire files that will be linked to the page.
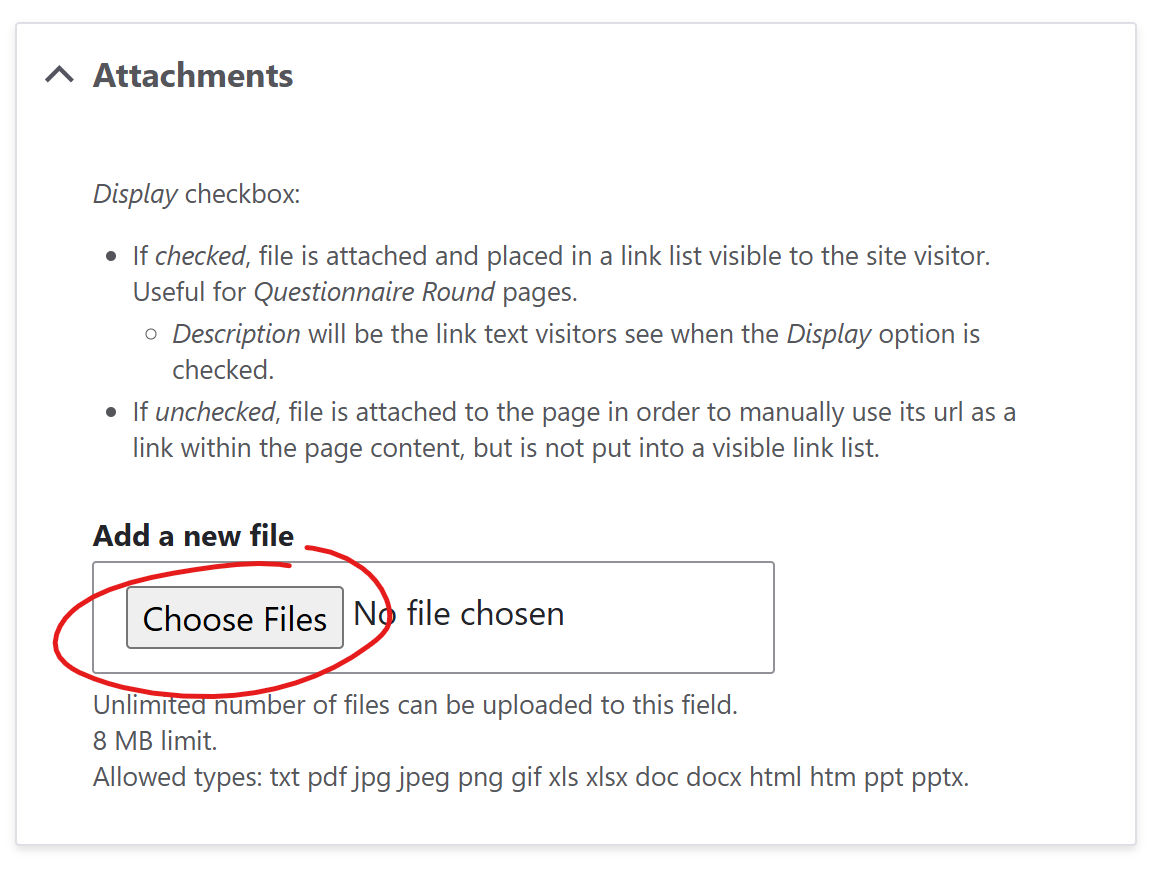
- Scroll to the Attachments section (near the bottom of the page)
- Click Choose Files
- Browse to the folder containing the questionnaire HTML files.
- Select all questionnaire files
- Click Open
Note: Attaching files does not automatically place them into the page content. The files are copied into Drupal's file directory and become available for linking.
Step 4: Collect the new file URLs
After the files are attached:
- Click an attached filename in the list.
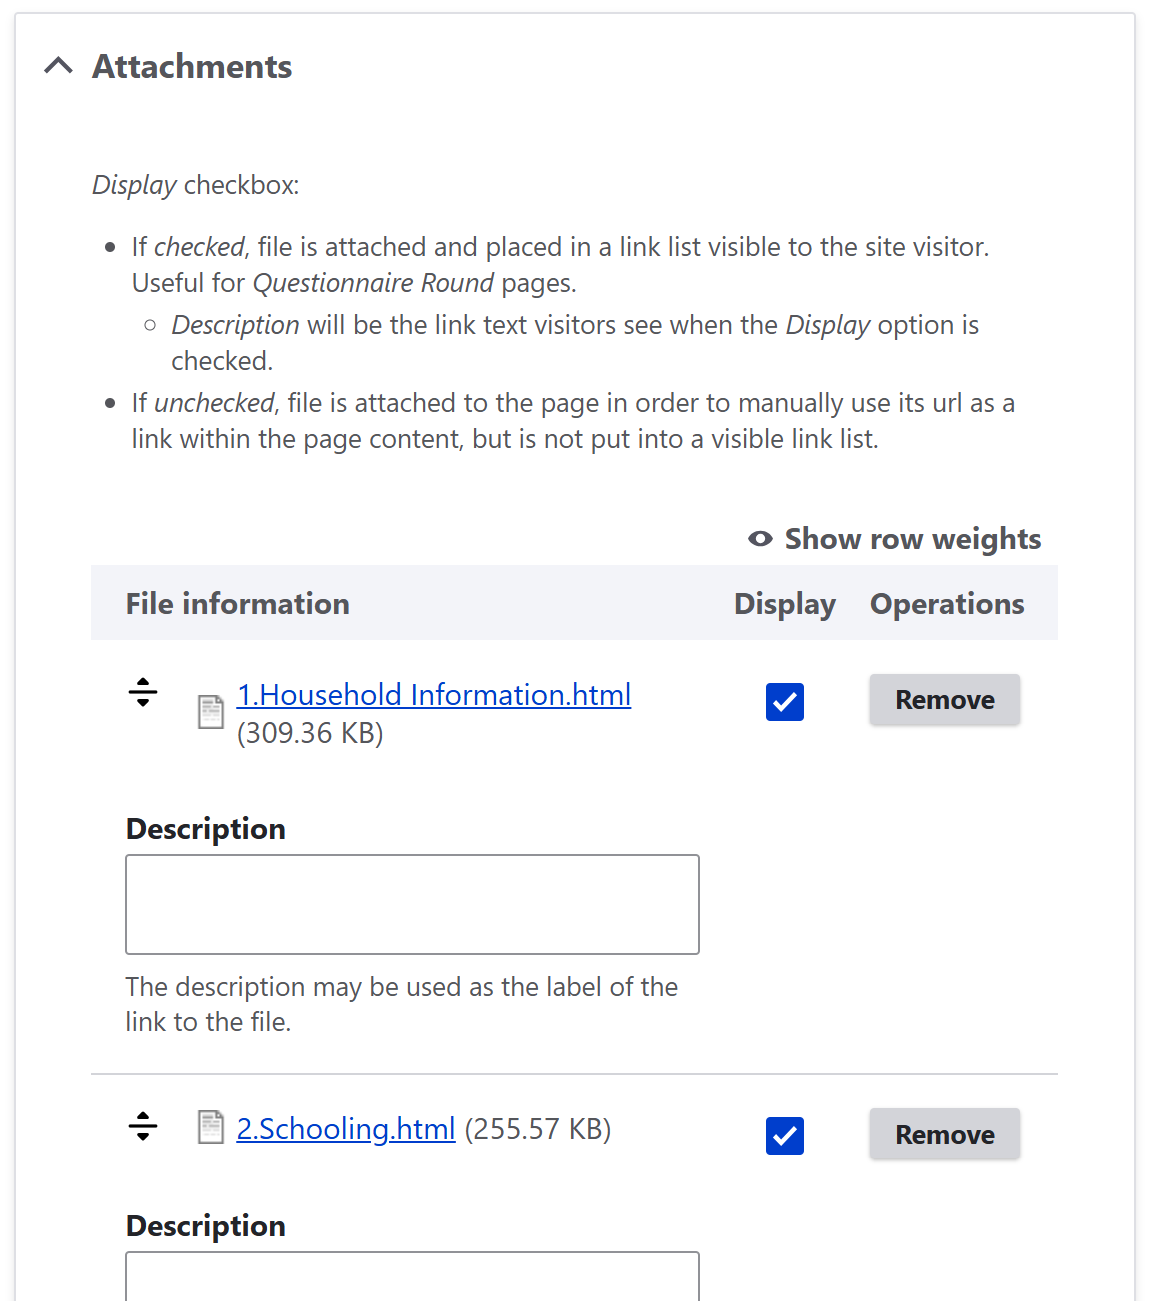
- Copy the file path beginning with: /sites/.... and ending with: .html
- Example:
/sites/default/files/attachments/2026825/1.Household%20Information.html 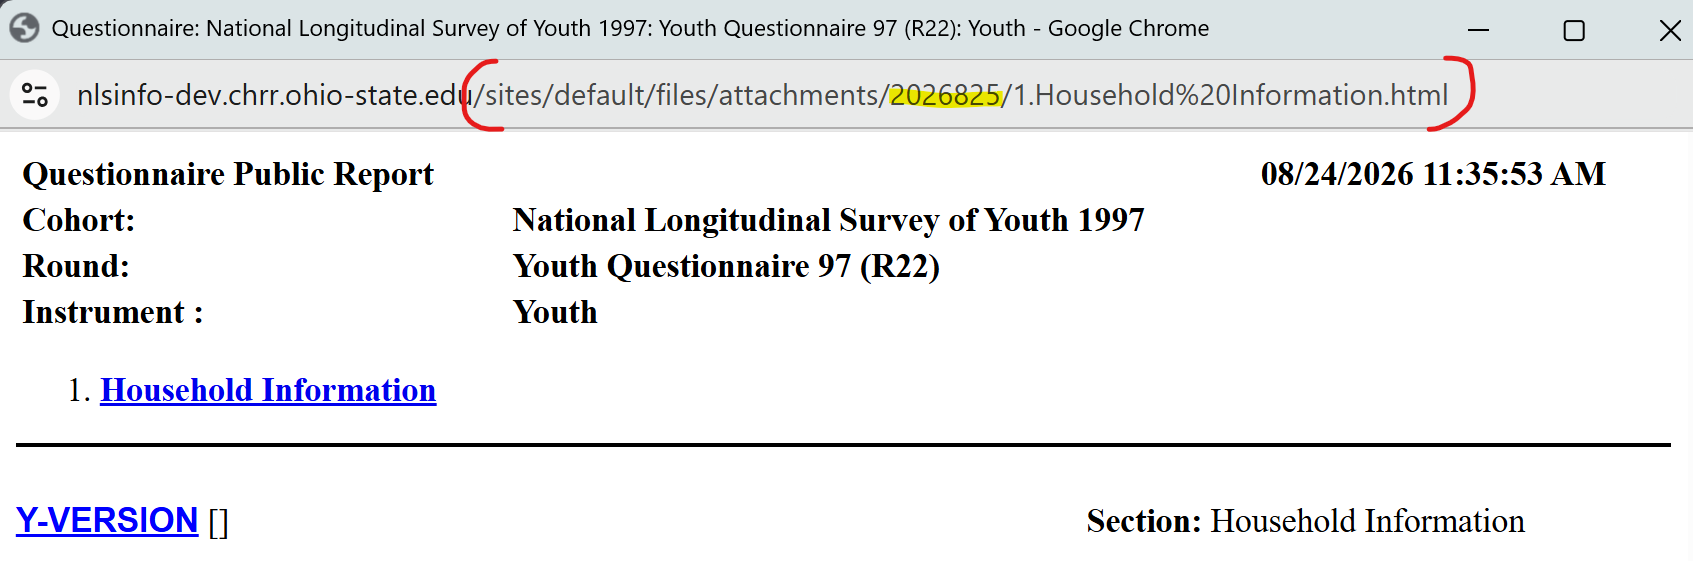
- Example:
Notes:
%20in a URL represents a blank space in the filename.- The URL will contain the upload date.
- If a file has been uploaded previously on the same day, Drupal may append _# to the filename to differentiate the new version in the directory folder.
Optional:
Collect all of the URLs into a text list while in the Attachments section before scrolling up to the editor to enter them. This will save time from scrolling back and forth.
Step 5: Replace existing questionnaire links
- Return to the Body section (near the top of the page).
- Expand the questionnaire sections (clicking and expanding the summary disclosure -screenshot in step 2).
Note: The HTML icons may appear stretched within the editor. This is normal and does not affect the published page.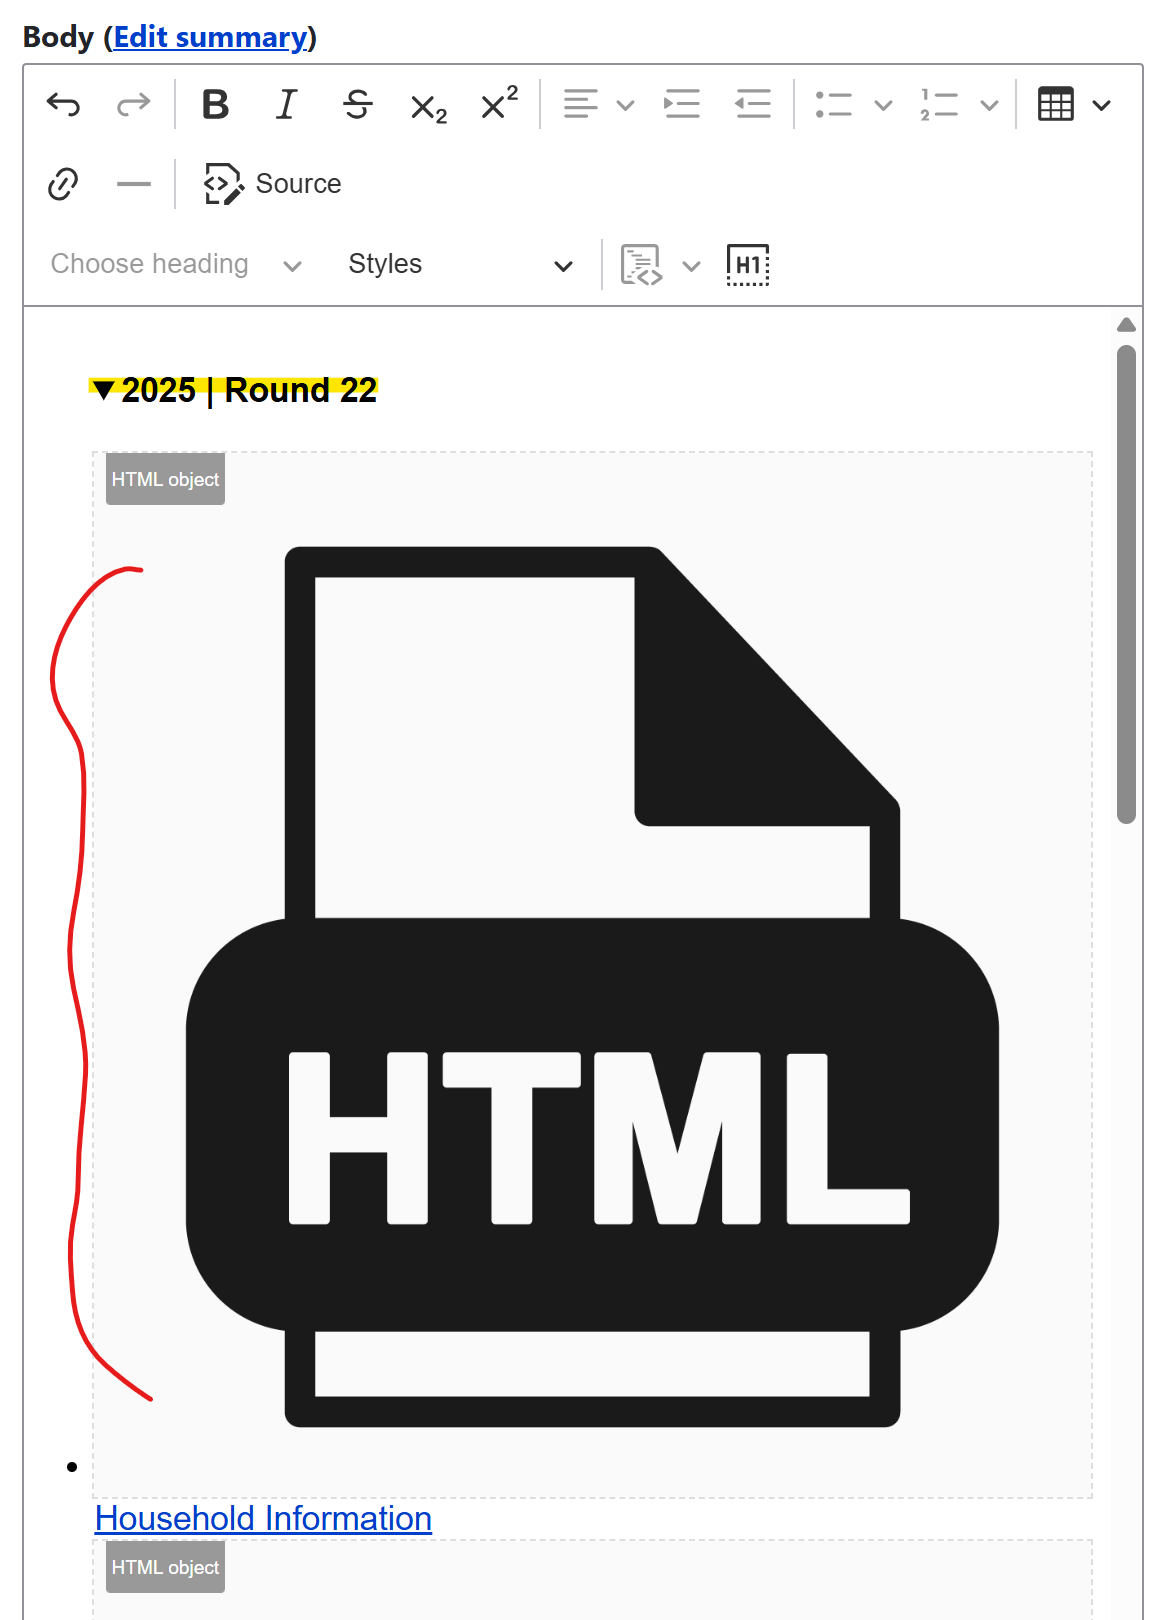
For each questionnaire:
- Locate the questionnaire link
- Click the link
- Select Edit link
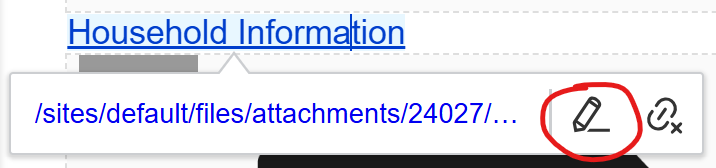
- Replace the old URL with the new URL copied from the attachment
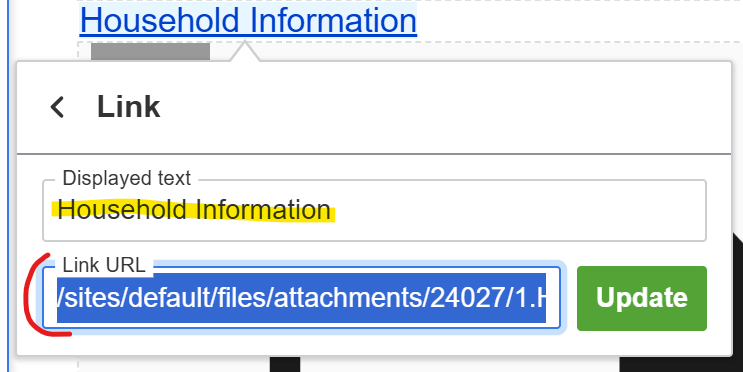
- Revise the Displayed text to match the file (if this has changed).
- Click Update
Repeat for every questionnaire in the list. See step 6 for adding or removing questionnaires.
Step 6: Add or remove questionnaires
Questionnaire lists may change from one round to the next.
Remove a questionnaire
If a questionnaire no longer exists in the new round:
- Click Source (to enter the code view)
- Search for the questionnaire name
- Locate the corresponding
<li>element - Delete the entire list item from opening
<li>to closing</li>
Example
Round 22 no longer includes a Health Behaviors questionnaire. Removing the following code, removes the entire bullet point including the HTML icon.
<li data-list-item-id="ee83868eab95de5fcf61db920be18fba8">
    <p class="file-icon" id="r21-15">
       <img alt="html icon" src="/sites/default/files/icons/file-html.png">
       <a href="/sites/default/files/attachments/24027/15.Health%20Behaviors.html">
            Health Behaviors</a>
    </p>
</li>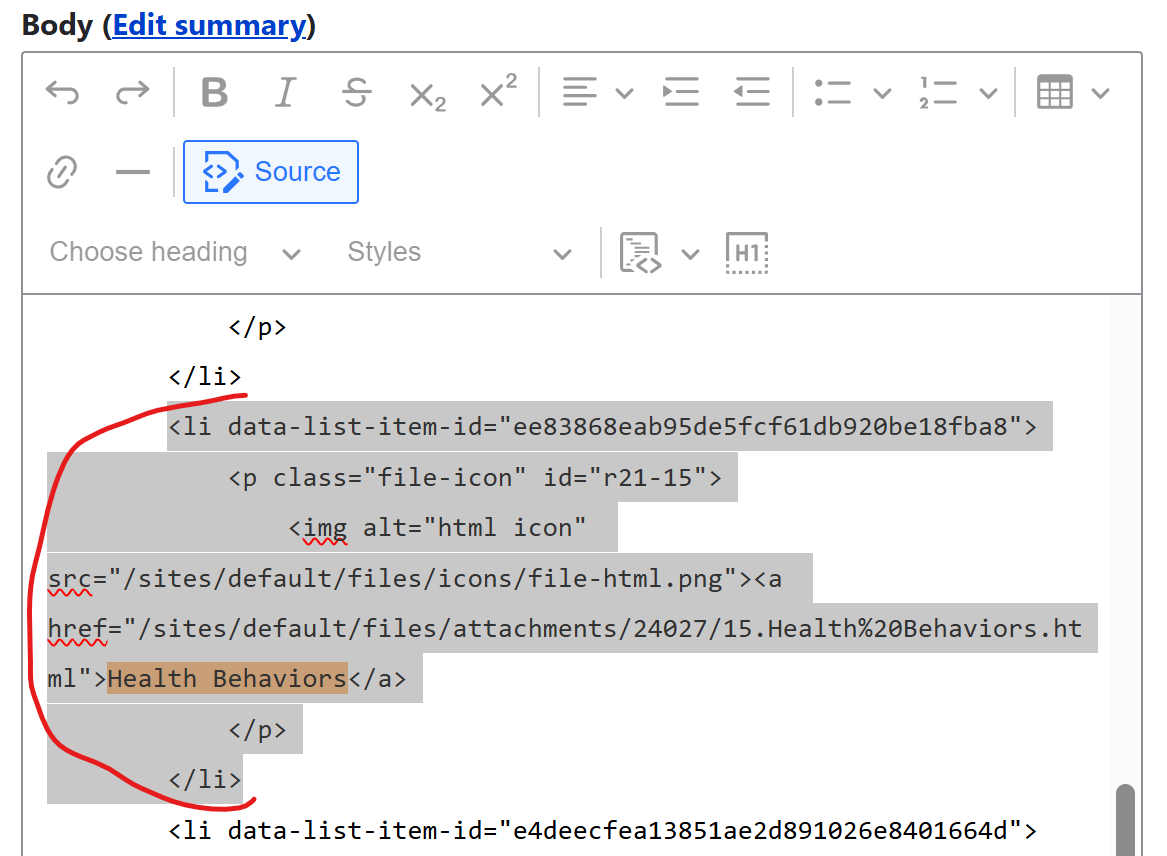
Add a new questionnaire
When adding a questionnaire:
- Click Source
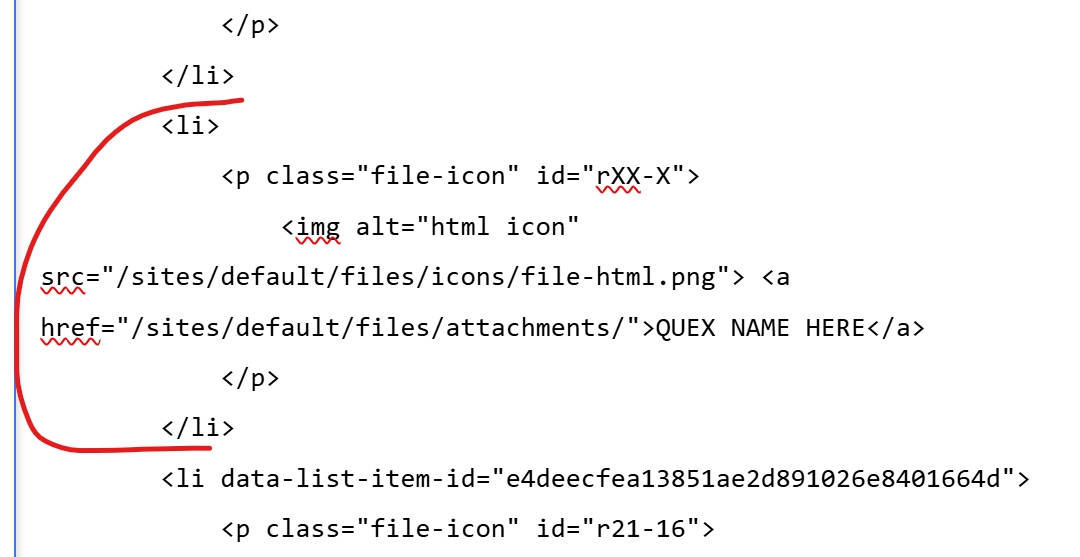
- Copy the following code:
-
<li>
    <p class="file-icon" id="rXX-X">
       <img alt="html icon" src="/sites/default/files/icons/file-html.png">
       <a href="/sites/default/files/attachments/">QUEX NAME HERE</a>
    </p>
</li>
-
- Paste it into the appropriate location
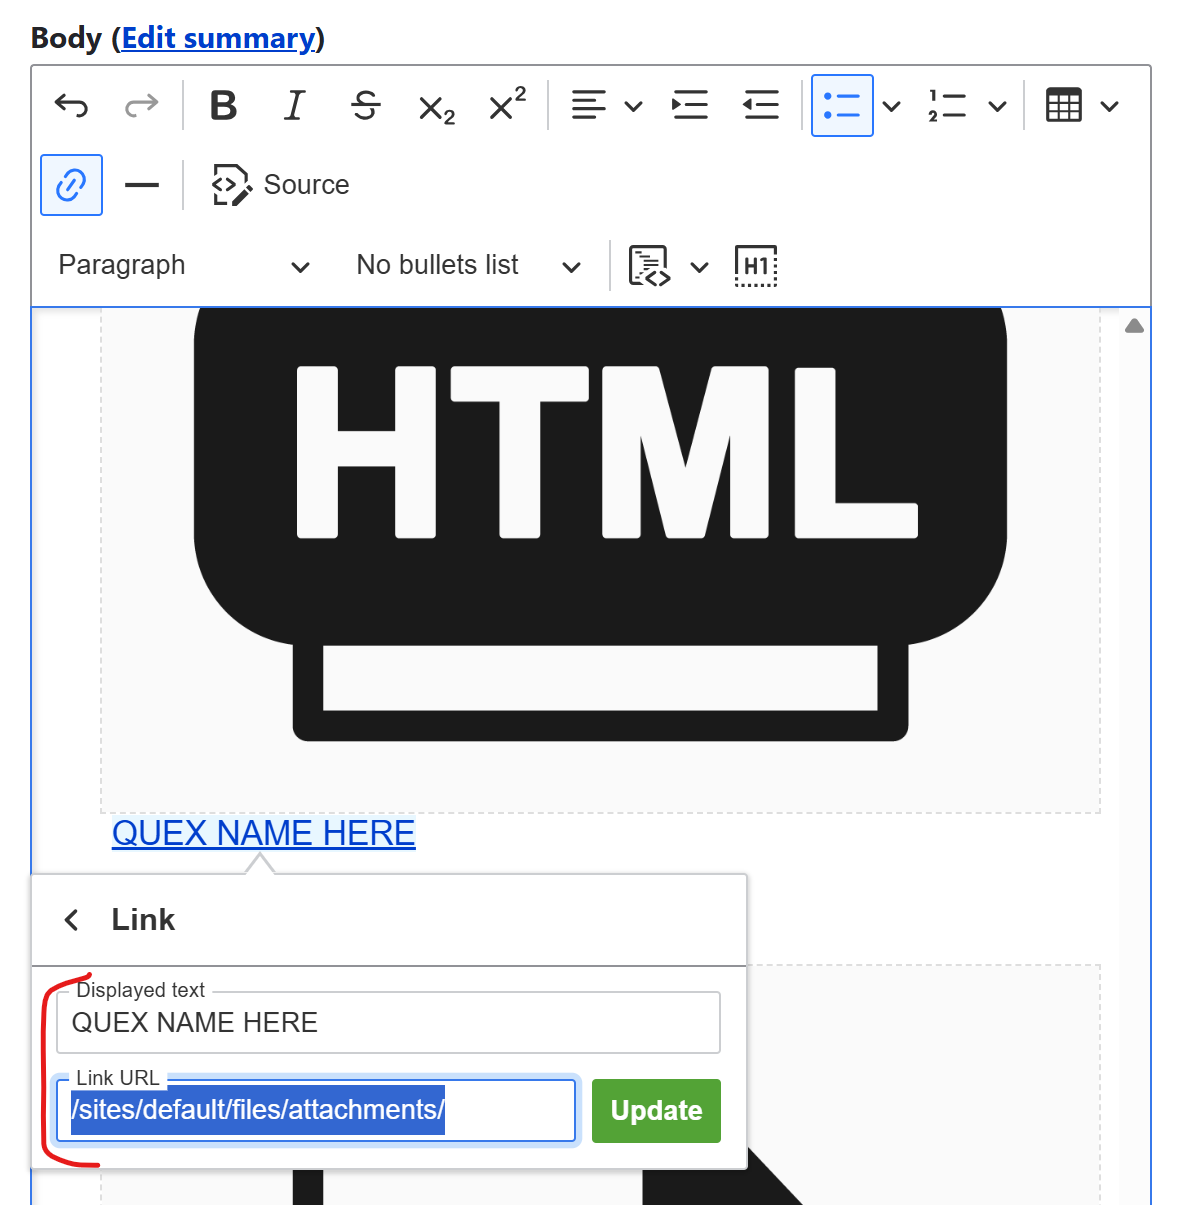
- Hint: While in the normal editor view, add a placeholder bullet point where you'd like to add the file. Then in the Source view, search for that placeholder to replace with the above code. Make sure to delete the <p></p> tags that the editor wrapped your placeholder text in by default.
- Click Source to return to the normal editor view.
- Update the Link URL and Displayed text (same as step 5).
Step 7: Update associated IDs
Each questionnaire item has a unique ID so it can be targeted (if needed) in a programmatic way.
Update the ID attributes:
- Click Source to enter the code view.
- Search (CTRL+F) for
id="rto highlight the IDs. - Change the round number and append with incrementing numbers:
- Example:
id="r22-1",id="r22-2", .....id="r22-n"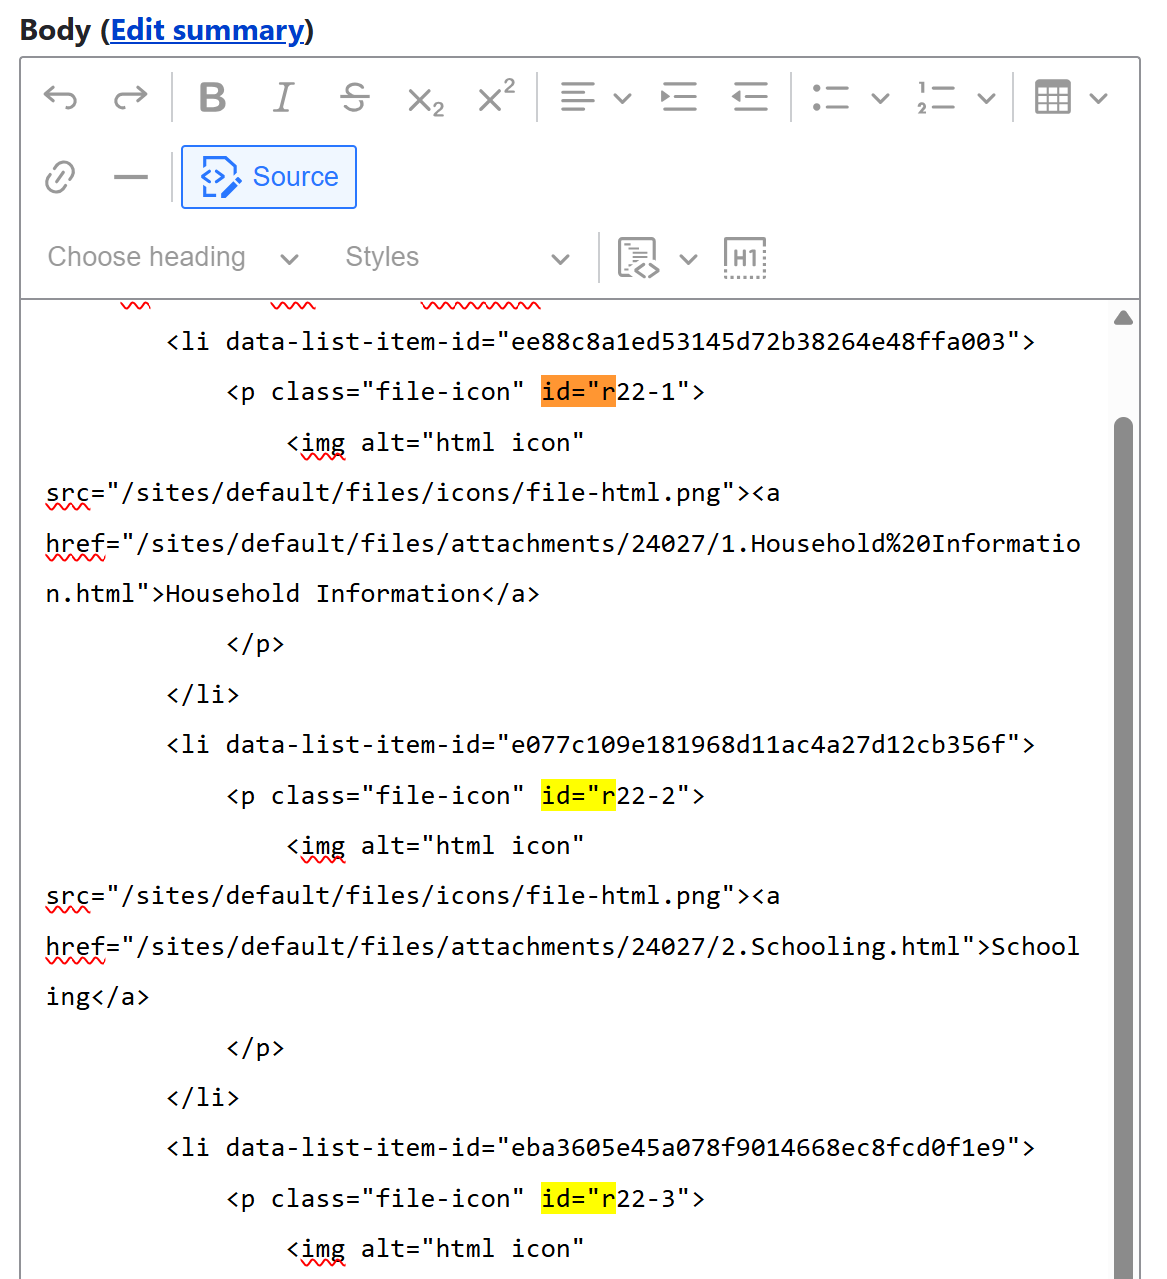
- Example:
Step 8: Update the page URL alias
The URL alias is the user-friendly web address displayed when visitors access the page. When the page was cloned, it was assigned a node number as its default URL.
Example: https://nlsinfo-dev.chrr.ohio-state.edu/node/893
We will set the URL alias:
- Re-open the page you cloned. In this example, R21 Questionnaires.
- Copy the URL alias from the right column.
- Paste it into the new page's URL alias field and update the round number at the end to match the content.
- Example:
/content/cohorts/nlsy97/other-documentation/questionnaires/round-22 - When the page is saved, the node number will be replaced with the alias text.
- Example:
Notes:
- The URL alias starts with
/content/ - The URL alias also contains the cohort, e.g.
/content/cohorts/nlsy97/so don't mix cohort aliases or the page will populate in the wrong cohort section.
Step 9: Save the page and verify links
- Click Save (bottom of page)
- Click each questionnaire link to verify that they're working.
- Hint: Hold CTRL while clicking link to open in a new browser tab.
- Confirm that the correct questionnaire opens with each link.
- The HTML page reflects the new round (should say R## at the top of the opened questionnaire file).
This completes the creation of the new questionnaire page.
Navigate to: NLSY97 → Other Documentation → Questionnaires
Check that the new page has been added to the main questionnaire list and that the summary disclosure expands to reveal the round's linked files.
If everything looks good and links open the correct files, email CHRR.help to:
- Upload the linked questionnaire files to the code repo, and then
- push nlsinfo-dev to nlsinfo-staging for testing.
After you have tested the page and linked files on staging, IT can push it to production.